
使用GitHub Workflow工作流自动部署静态博客
Background
自很久以前就开始使用静态博客,并且在GitHub Pages上部署后同时在服务器上进行同步,每次push新的修改后都需要在服务器上手动pull,因此决定探究使用Github Workflow自动化部署静态博客的解决方案。
Intro
Github Workflows
在仓库的目录下,创建.github/workflows目录,目录内存放需要使用的工作流配置文件。
例如:
|
|
Rsync Action
Github提供了很全面的Actions操作,包括Hooks功能,支持在对仓库进行push、merge等操作后触发对应的脚本。对于本需求,我们需要使用GitHub的Rsync Action插件。
包含如下参数:
switches* - The first is for any initial/required rsync flags, eg:-avzr --deletersh- Remote shell commandspath- The source path. Defaults to GITHUB_WORKSPACE and is relative to itremote_path* - The deployment target pathremote_host* - The remote hostremote_port- The remote port. Defaults to 22remote_user* - The remote userremote_key* - The remote ssh keyremote_key_pass- The remote ssh key passphrase (if any)*标记为Required
也就是说我们要配置远程服务器的主机地址host,ssh端口,用户名,ssh公钥,以及同步的目的地址
对于GitHub WorkSpace,也就是仓库内的文件,需要指定要同步的目录,可以用.来同步整个目录。
最终需要实现的效果即为:
本地通过hugo/hexo生成静态文件后,push到远程仓库后即可自动触发服务器静态资源目录和GitHub仓库的同步,保证自动实时更新。
Github Secret KV
GitHub为每个仓库提供了Secret配置,相当于系统环境变量,防止在yml中泄露敏感信息,可以利用该功能配置服务器的host,ssh公钥,用户名等信息。
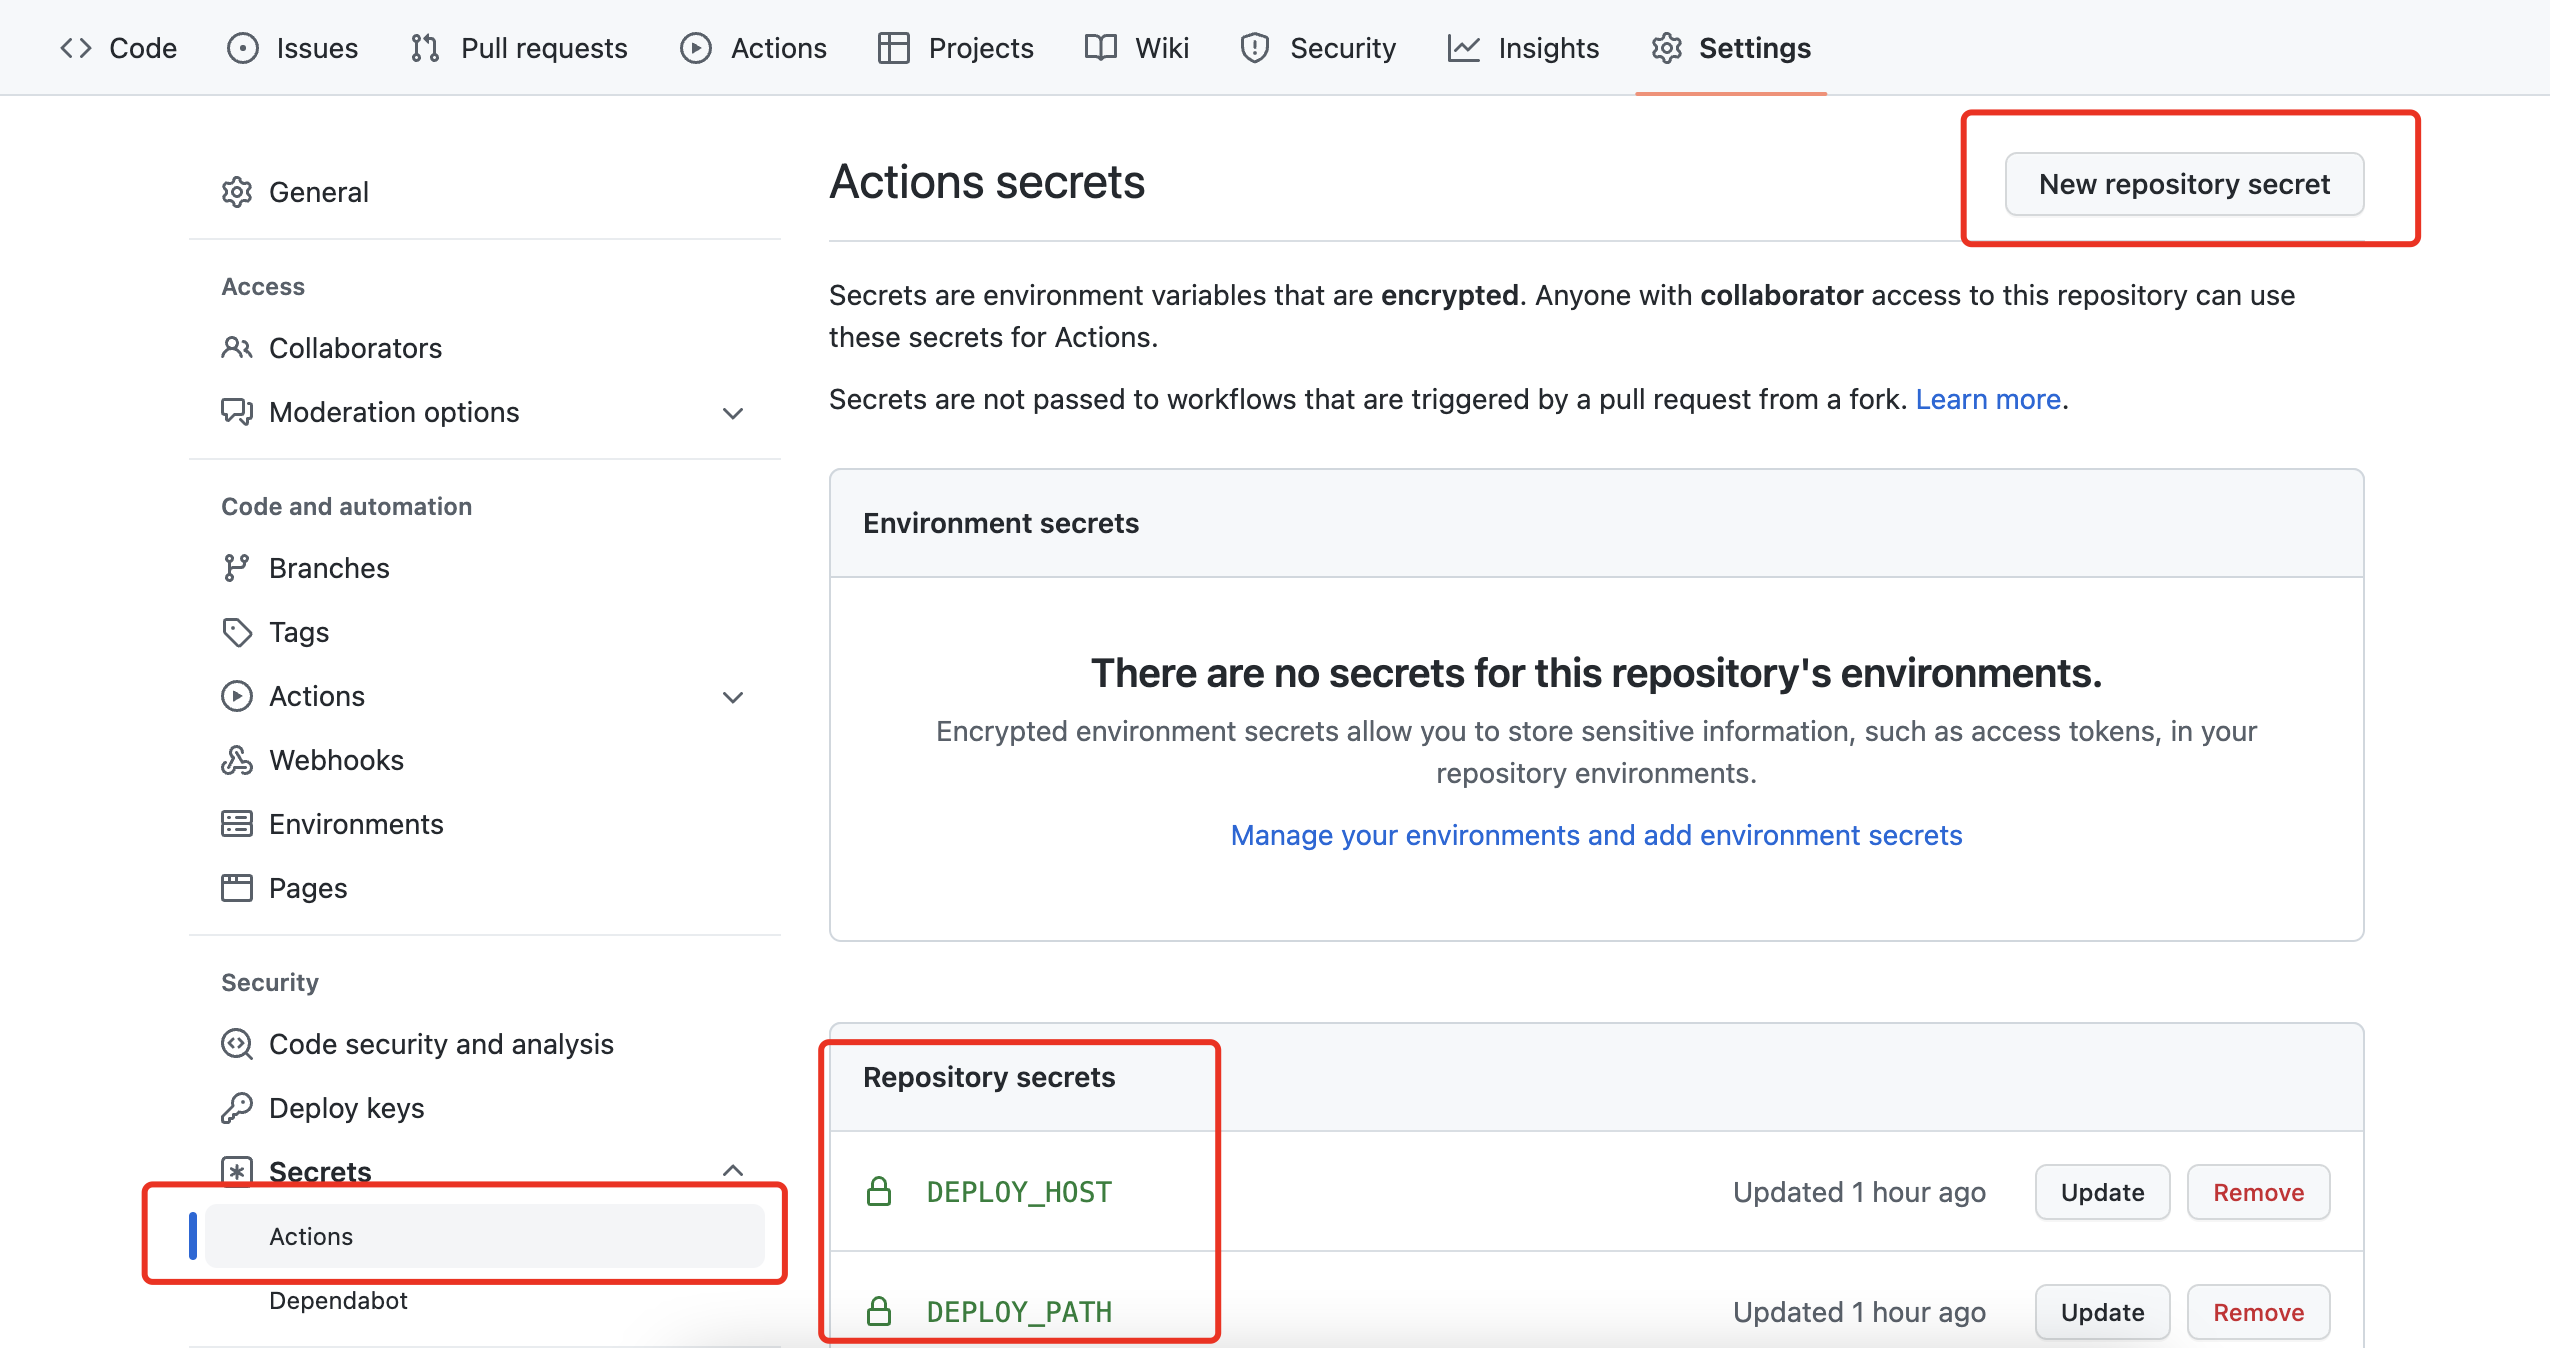
如上图所示,可以进行GitHub Secrets的配置,通过new repository secret添加新的环境变量。
对于这些变量的访问,通过在yml中${{ secrets.DEPLOY_HOST }}类似的方式进行访问。
Rsync-Action.yml
编写yml工作流
|
|
这里我同步的仓库目录即为整个目录,通过.来配置
服务器同步目录即为/var/www/blog目录
服务器公钥尽量重新生成,GitHub会拒绝已经添加过的公钥
|
|
新公钥不防起名叫github-action.pub
将github-action(生成的新私钥)丢进GitHub Secrets中的SSH_PRIVATE_KEY变量中
再把该公钥加入到authorized_keys中
|
|
此时,将该yml push到远程仓库中,即可触发同步action。
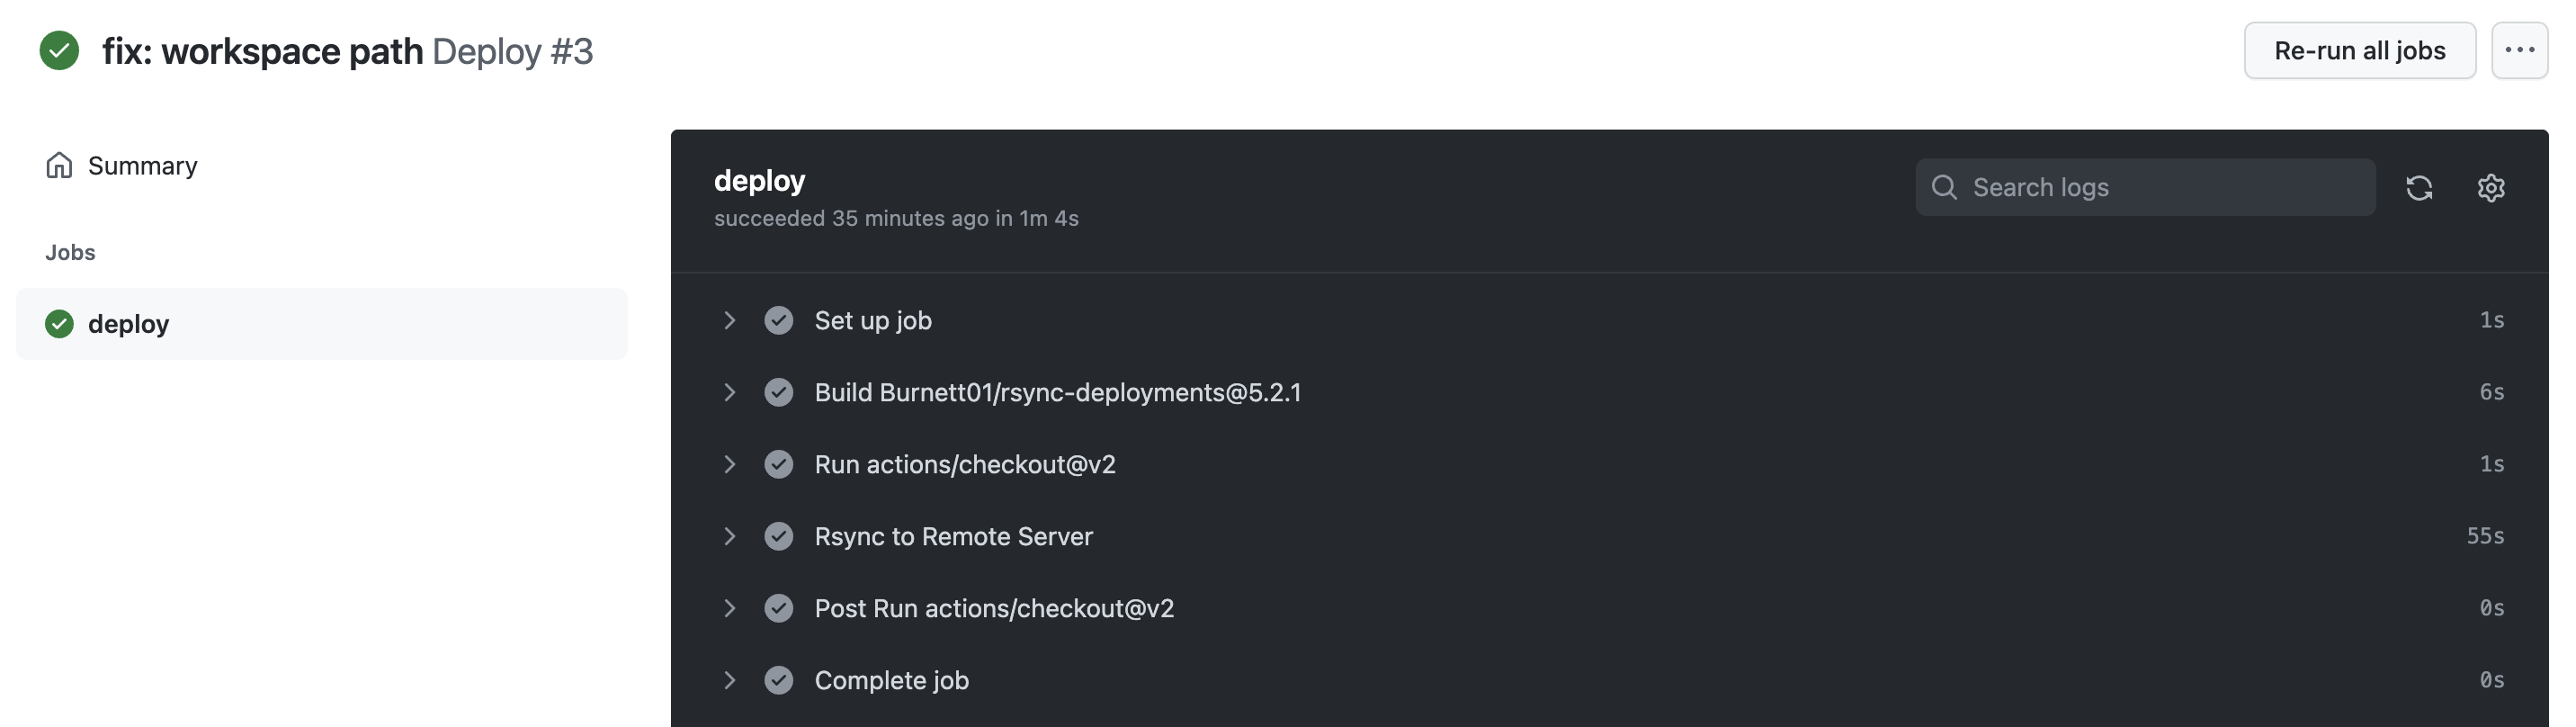
如图所示,工作流全部完成。
顺便还配置了七牛云图床,Typora和PicGo配合的自动图片上传,就不用每次手动上传了图片了,写作体验有效提升。
Reference
Deploying to a server via SSH and Rsync in a Github Action